| back to Astronomy Home
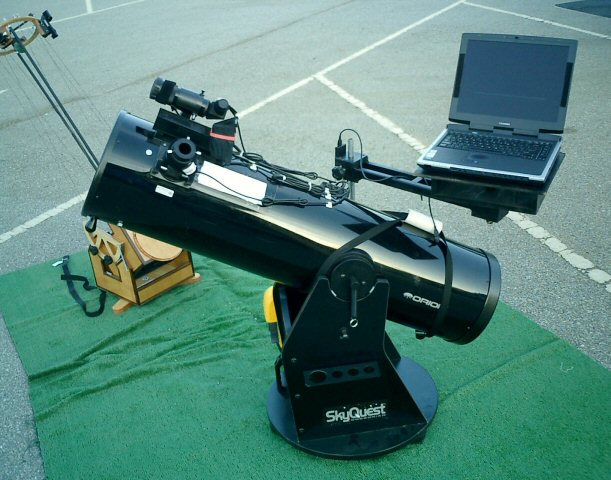
From the first day I have enjoyed modifying and adding on to my Orion 10XT telescope. The following shows my current configuration and shows details of some of the modifications.
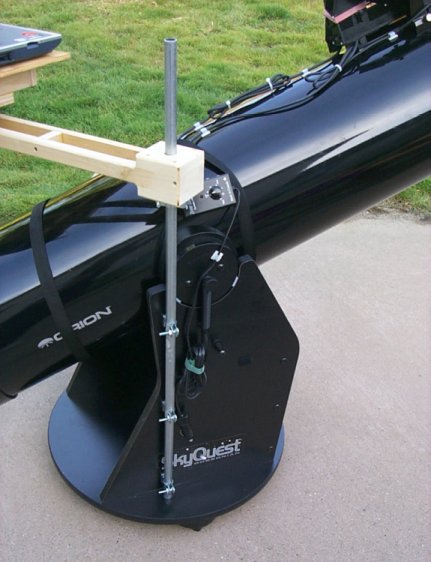
Shown in the above photo are the following
The scope in the background is my 8″ String Travel Scope
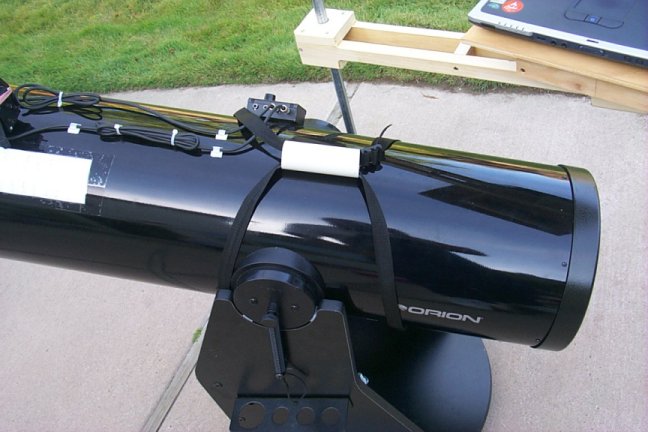
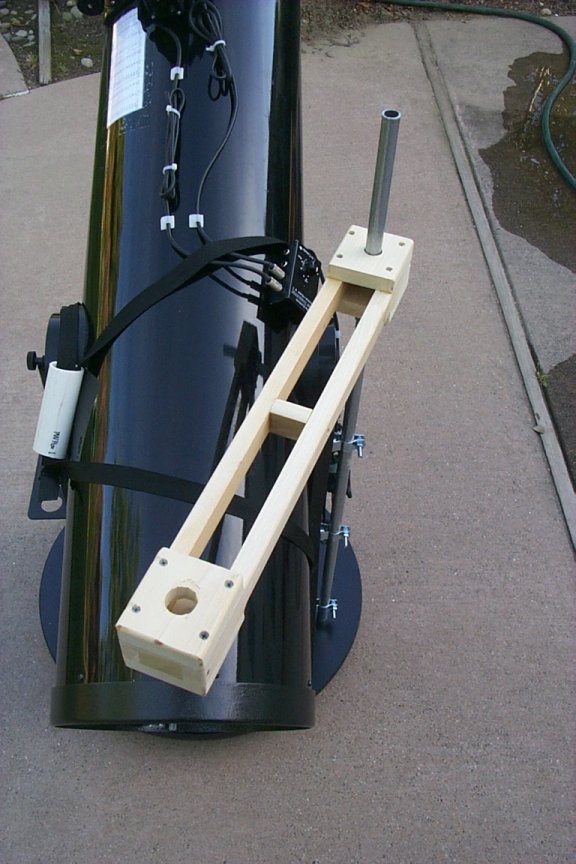
OTA Carrying Handle
The addition of the OTA Carrying Handle allows me to move the telescope in one trip. I carry the OTA in one hand and the base in the other. The strap was very easy to add, I purchased an 8 foot nylon web tie down strap from the local hardware store and threaded it around the OTA and through a 1″ diameter section of PVC pipe which acts as the handle. Because the nylon webbing goes around each side of the altitude bearing it is located at the center of gravity for the OTA.
Laptop Mounting Arm
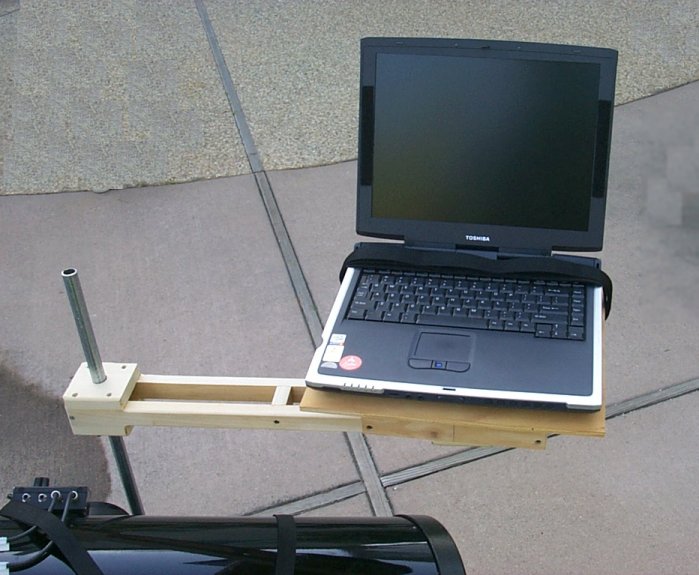
Note : I’ve had numerous requests about offering this mounting arm for sale. So I made a batch and am offering them for sale for those who are interested. Contact me at astronomy@craigcolvin.com for details. I use my laptop at my telescope for most observing sessions. I use it for two functions, the first is as a star atlas. I use SkyMap Pro and am very happy with it. I overlay Telrad circles on the map and use it to locate the object. I can also overlay finder and eyepiece overlays on the map to confirm that I am on the correct object. I tried many different astrononomy plantetarium type programs before finally settling on SkyMap Pro and am very happy with the results. The second function I use the laptop for is keeping an observing list and observing log. For this purpose I use AstroPlanner which is another highly recommended program. Not only will it keep observing lists but it allows me to sort them by “Unobserved objects that are currently visible” in the sky. This feature alone saves me a lot of time while observing. I was keeping my laptop on a small portable table but I was constantly having to get up an move between the laptop and eyepiece and it was getting tedious. As I moved around the sky it seemed that the laptop was always on the opposite side of the telescope. To solve this problem I decided to mount the laptop to my telescope so that it was always within reach when I was at the eyepiece. After thinking about the problem for several months, here is what I came up with.
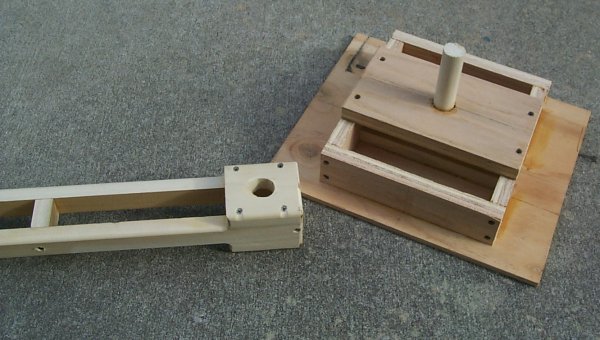
The laptop rests on a wooden platform at the end of this rotating arm. The platform pivots, so by pivoting the platform and rotating the arm I can place the laptop in just the right spot for use while observing.
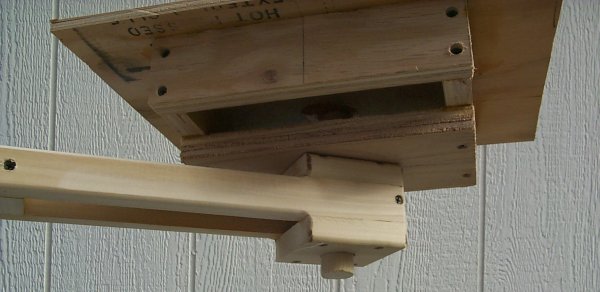
This is a picture of the wooden platform that the laptop rests on. I plan on making other platforms out of plexiglass that can hold a paper star atlas for nights when I don’t use the laptop.
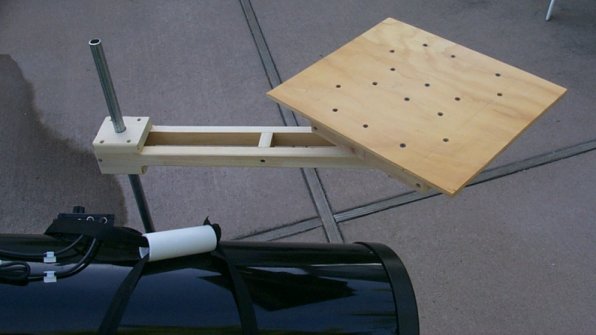
This image shows the arm construction. The hole at the near end is 1″ in diameter. The laptop platform has a 1″ rod protruding from the bottom of the platform that mates with the holes in the arm. This allows the platform to freely rotate through 360 degrees. The other end of the arm is the same diameter as a section of 1/2″ conduit (the arm hole size is slightly larger then 5/8″). This just slips over the conduit. The weight of the laptop applies enough pressure on the conduit to keep the arm at whatever height it is adjusted to. This allows me to slide the arm up and down at will.
The image above shows how the underside of the laptop platform pivots.
and another view.
The conduit which supports the arm is attached to the base of the XT10 using three conduit clamps bolted through the left support. This seems to be perfectly adequete to support my 6+ pound laptop at the end of the arm.
|


Connect with me: